
Skill Level: Novice
Objectives
- Install vmWare
- Create a Linux Virtual Machine (Ubuntu Server)
- Create a Kali Virtual Machine
- Identify the IP address of each
- Ping from machine to machine on a bridged virtual network
Introduction
This short guide is how to build a home security training lab.
The Hypervisor
I prefer vmWare . Download it and install it. There is Workstation for Windows and Fusion for Mac.
Building a VM
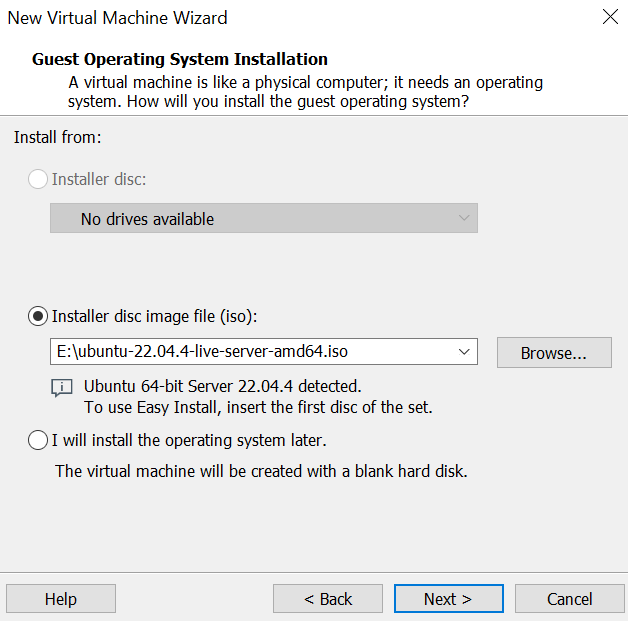
- Open vmware and click ‘Create a New Virtual Machine’
- Select ‘Typical’ and click Next

- Choose the .iso file you downloaded. By default, most Windows browsers (Chrome, Edge, Firefox, etc.) will save it in a folder marked Downloads (we’ll get into file management much later).
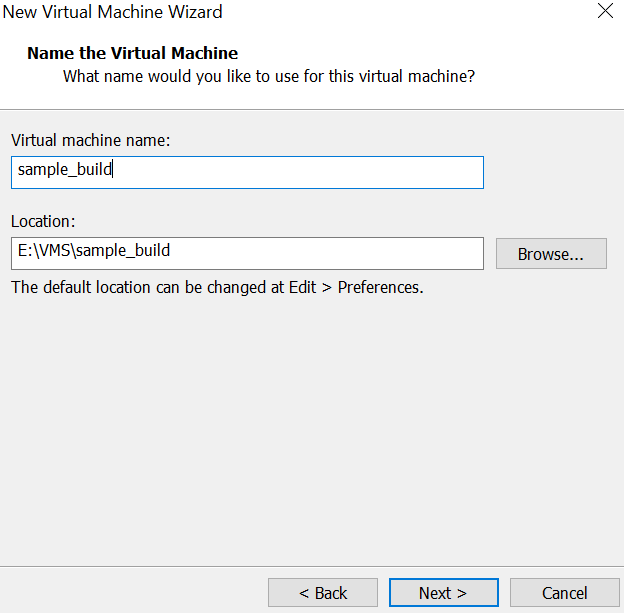
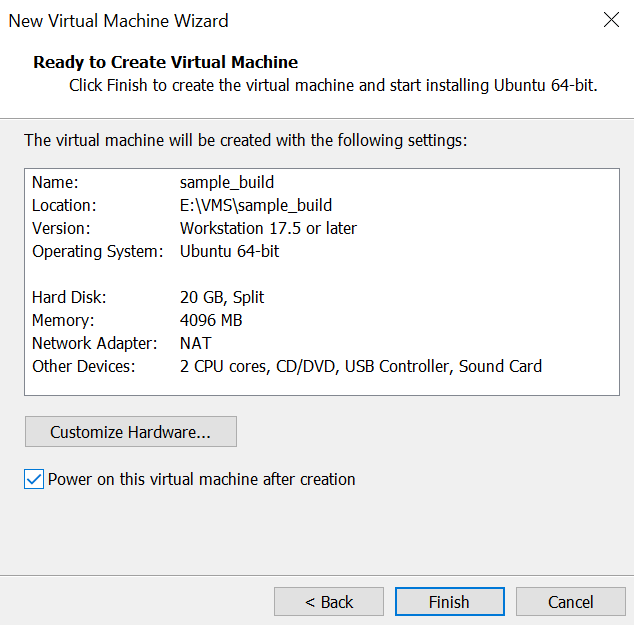
- Give the VM a name that is meaningful. Hypervisors save virtual machines like files. They reside in a directory and can be easily copied and moved. Notice where mine is being created. It’s in the directory \VMS\Sample_build on the E: drive
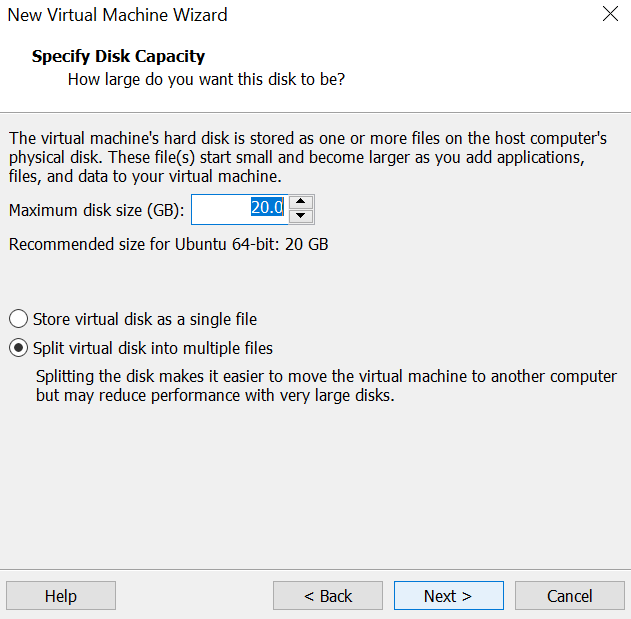
- Choose the default disk size of 20GB
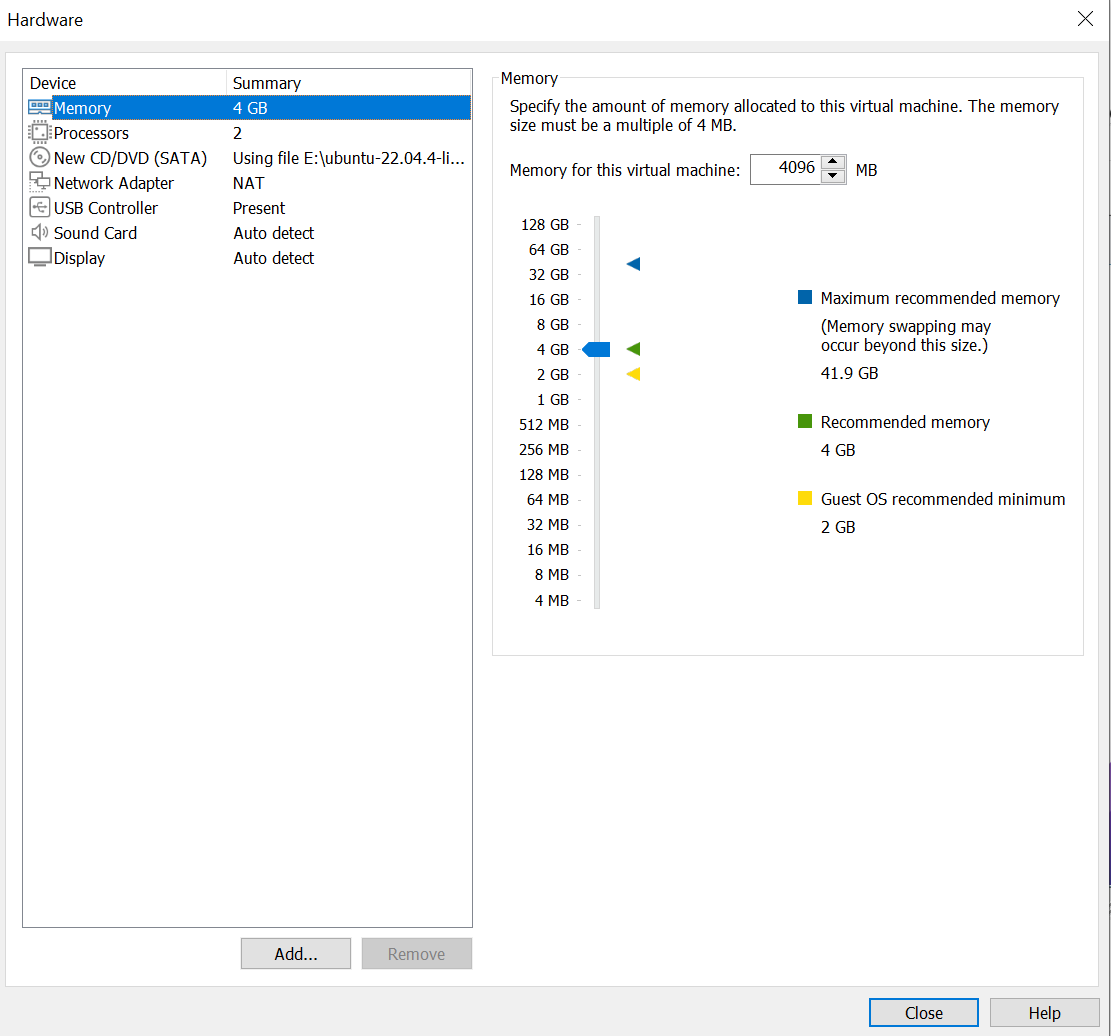
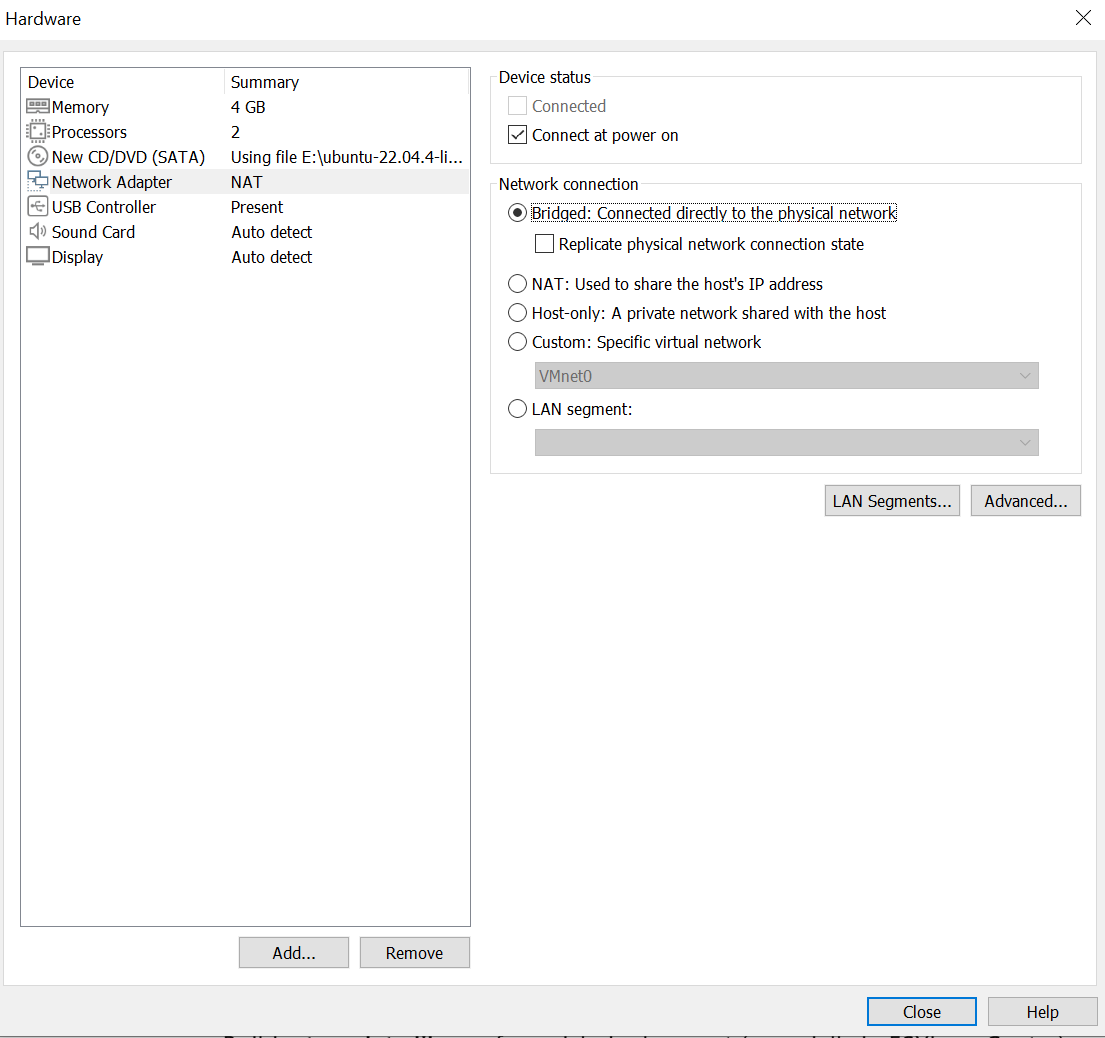
- Click the Customize Hardware… button
- Click the Network Adapter
- Change to Bridged
- Close and the virtual machine will start.
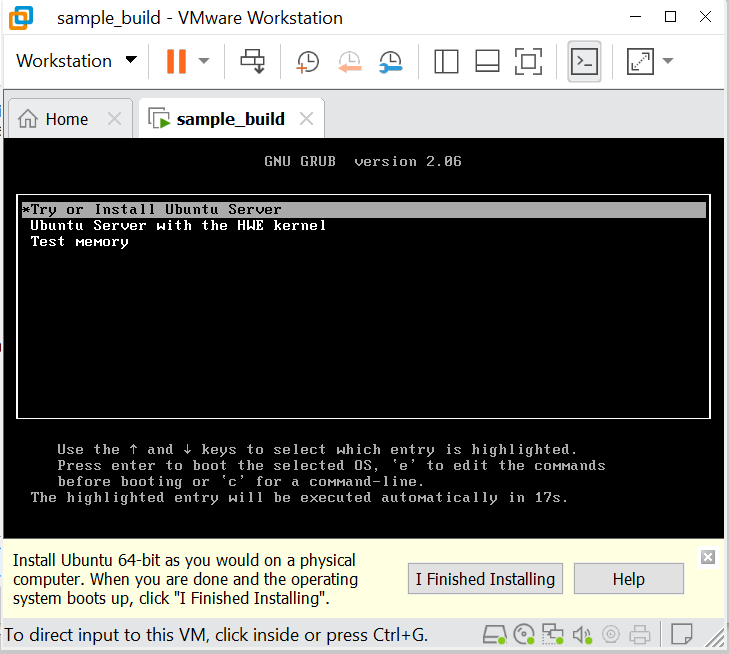
- Accept the default options for all the screens and the OS will eventually install.
The Attacker Station (Red)
Kali – I prefer the ISO and hand install process. You can also download a pre-built VM. There is no wrong answer; especially if this is your first lab build.
- Get the VM up and write down your password in your Red Team book
- SNAPSHOT THE VM.
- Get in the habit of snapshotting any VM as soon as you get the OS installed and running.
- Taking a snapshot of a clean install makes it fast and easy to revert to known clean.
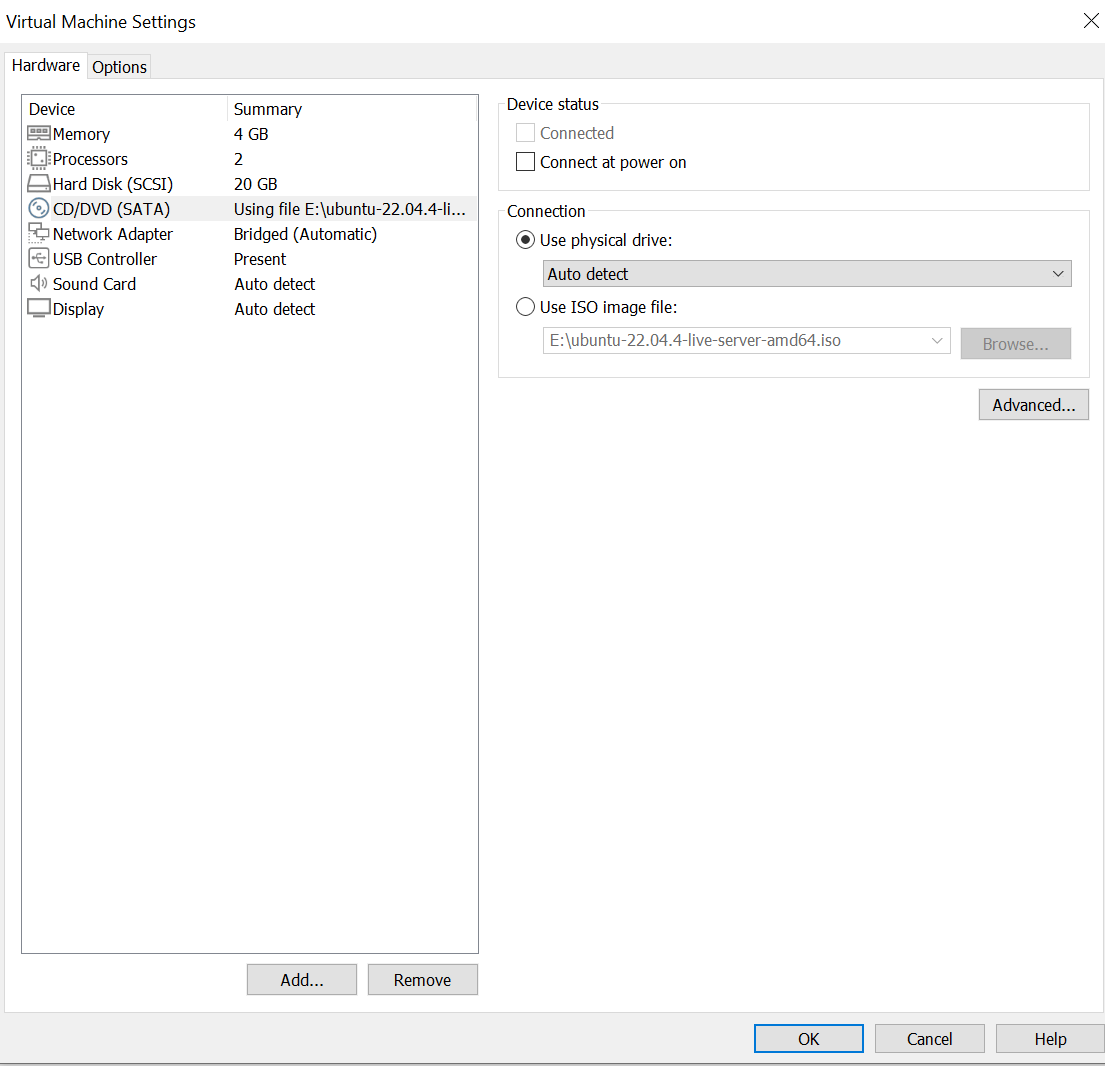
SNAPSHOT TIPS
- Power the VM off
- Edit the VM to remove your ISO or any attached CD/DVD installation files
- VM->Settings->
- Uncheck Connect at power on
- Check Use physical drive
- Click on VM->Snapshot->Take Snapshot…
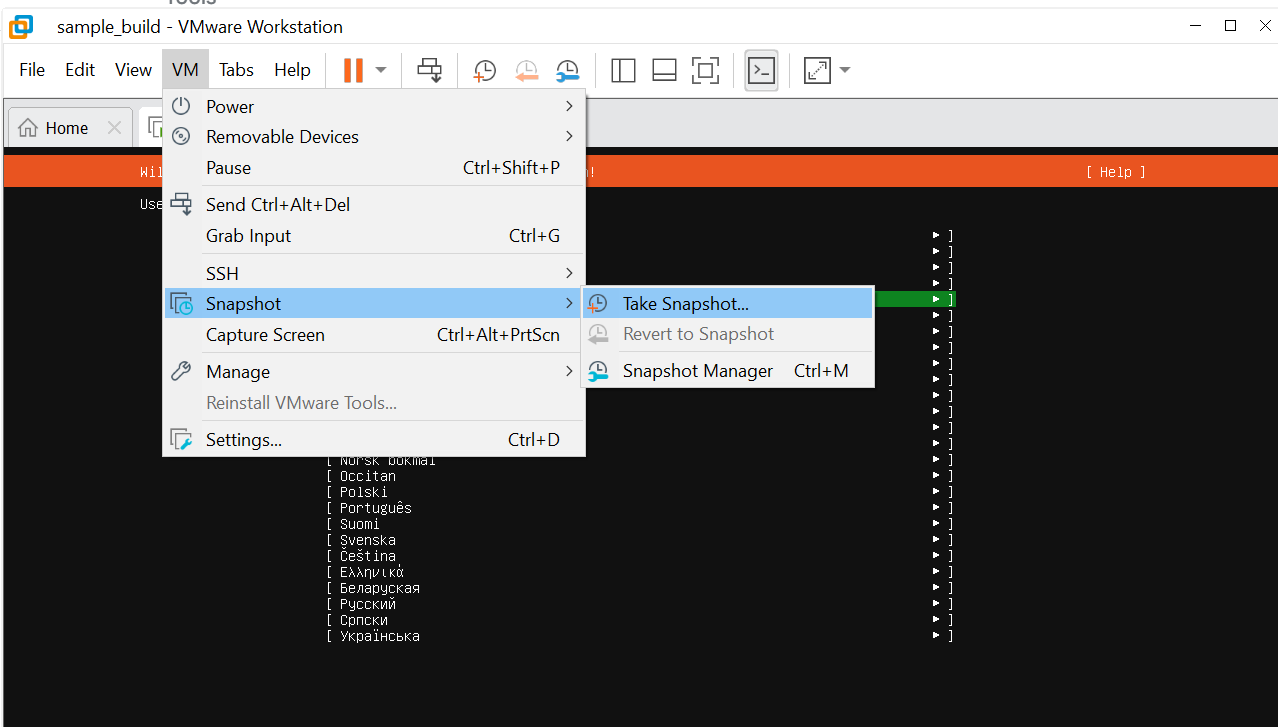
- Give the snapshot a meaningful name (e.g. ‘clean install’, ‘initial install’) and use the description field to clearly state the date, OS and version. I’ve even put ‘REVERT TO HERE’ just to be clear.
- Over the weeks and months of your builds you’ll be switching between more and more VM’s, various saved states, etc. Better notes today = less confusion tomorrow
Install Linux
Any flavor of Linux – it does not matter. I prefer Ubuntu. You will be asked to create a user with a username and password. I use sadmin for the username and chiapet for the password and I have for years.
- Why? This is a private lab; who cares?
- I need to be build quickly and reliably.
- You can return to this machine next month/year(s) and still login.
Objective Test
- What is the username and password of your Linux server?
- What is the username and password of your Kali box?
- What is the IP address of your Linux server? (hint – login and type: ip a)
- What is the IP address of your Kali box?
- Can you ping each box from the other?
- syntax is: ping <ip address>
- If your Linux server has an IP address of 192.168.100.22 you would type (from your Kali box): ping 192.168.100.22
Troubleshooting
- Read the screen. There may be an error on there.
- If there’s an error, copy and past it into your AI of choice
Next Steps
- Installing Apache
- Using host only networking
- Maybe some Wireshark
